Showing posts with label Crafts. Show all posts

Friday, January 11, 2013

Do-it-yourself Candles!

I'm out of control.

I never thought I would go so far, but let's make some candles!

You always need little gifts for random events that come up, they're perfect to give as a gift. It's great to have something like this on hand to grab as you walk out the door.

Cast of characters:


  • Wax paper (to protect your work surface)
  • Pot
  • Glass container (this measure cup works perfectly, even has a spout)
  • Cutting board and knife
  • Candle or candy thermometer (VERY IMPORTANT!)
  • Bulk candle wax (purchased at Michaels, or you can use old candles)
  • Candle wax coloring (I'm using a Yankee Candle tart)
  • Wicks
  • Containers for the candles (these adorable mini wine glasses were cheap at the Goodwill)

Here's a close up of the important supplies.


Seriously, protect your work surface. You'll most likely spill some wax, and wax paper perfectly holds the spilled wax an keeps it from going all over your table.


Okay, so cut up your giant wax block into small chunks.


Place the chunks into the measuring cup.
Place your pot on the stove, add a few inches of water, then put the measuring cup into the pot.
This is really important. You obviously don't want to heat the measuring cup up on the stove directly and it's difficult to melt the wax in the pot directly. The water in the pot helps to slowly heat the wax up.


Slowly heat the wax, and I mean it, slowly on LOW.


Cut up a piece of the wax tart and add to the wax mixture. This serves two purposes, to color the wax and to add scent. You can use crayons to color the wax, it must be waxed based not things like food coloring. You can use liquid scent as well but it's easier to add pieces of the tart.


Grab the thermometer, and place in the melting wax. DO NOT HEAT THE WAX ABOVE 200 degrees, because, surprise, wax is flammable.


While it's melting, get your containers ready and place the wicks inside. Make sure they're straight in the container.


Dip the metal end of the wicks in a small amount of melted wax and place in the bottom, it'll help keep the wick in the right spot when pouring the wax.


Okay, when the wax is completely melted and see through, it's time to pour.


Pour till you reach the top, make sure the wick stays in place.


Let cool.


Repeat process until you fill all of your containers.


Wednesday, January 2, 2013

More glitter and glue?

I told you, winter and glitter go hand in hand.

Tired of boring old taper candles (that remind you of your grandmother's tapers), yeah, so am I.

Cast of Characters:


  • Taper candles
  • Glitter
  • Mod Podge
  • Sponge brush
  • Drop cloth (prevents a giant mess)

Spread a generous amount of mod podge on the taper candle using the sponge brush.


Throw some glitter on the drop cloth.


Roll the candles in the glitter until covered completely.


Throw em in some taper holders. See how much better it brings the table together than just plain white tapers?

Glitter and Glue

It's winter, that means that it's perfectly acceptable to put glitter on everything (well, almost everything, pending tackiness.)

After taking down all of my Christmas decorations, I realized, I needed more winter. I saw an idea and I ran with it. 
Glitter sign!

Cast of Characters:


  • White spray paint
  • Glitter (white)
  • Glue gun
  • Pencil
  • Canvas

Use the pencil to trace out what you're going to say. I used "Baby it's Cold Outside" Don't worry, the spray paint will cover the pencil marks, and if you suck at doing things right the first time like me, you'll appreciate using a pencil so you can erase mistakes.


Use the hot glue gun to trace over the pencil marks.


Spray paint the canvas.


While it's still wet, sprinkle the glitter on top.


Let dry, and viola.


Thursday, November 22, 2012

Snow globe?

Snow globes are pretty.

Let's make one that's simple to make and super cheap.

Cast of characters:


  • Epsom Salt
  • White glitter
  • Litte trees
  • Vase

Fill vase with epsom salt.


Put the trees inside.


Pour some glitter on top to add some sparkle to the "snow."


And viola!

Saturday, November 17, 2012

Photo Coasters

No one should ever have a glass on a table without a coaster. 

So make some pretty ones with unforgettable pictures.
Cast of characters:


  • Bathroom tiles (Home Depot, like 10 cents a piece)
  • Little felt circles
  • Pictures
  • Scissors
  • Pictures
  • Glue
  • Super Glaze or whatever brand thick epoxy you'd like

Cut your pictures to fit inside the tiles. Put some glue on the tile.


Put the pictures on the tiles.


Next, mix the epoxy per the directions on the box and pour ontop of the picture and tile. 
Make sure to cover your surface well. Epoxy is a thick thick glaze.


Smooth out and make sure it's evenly applied. 
Get rid of bubbles by blowing air in a straw at the epoxy.


Allow to dry. They'll be dry to touch in 8 hours and solid by 72 hours.


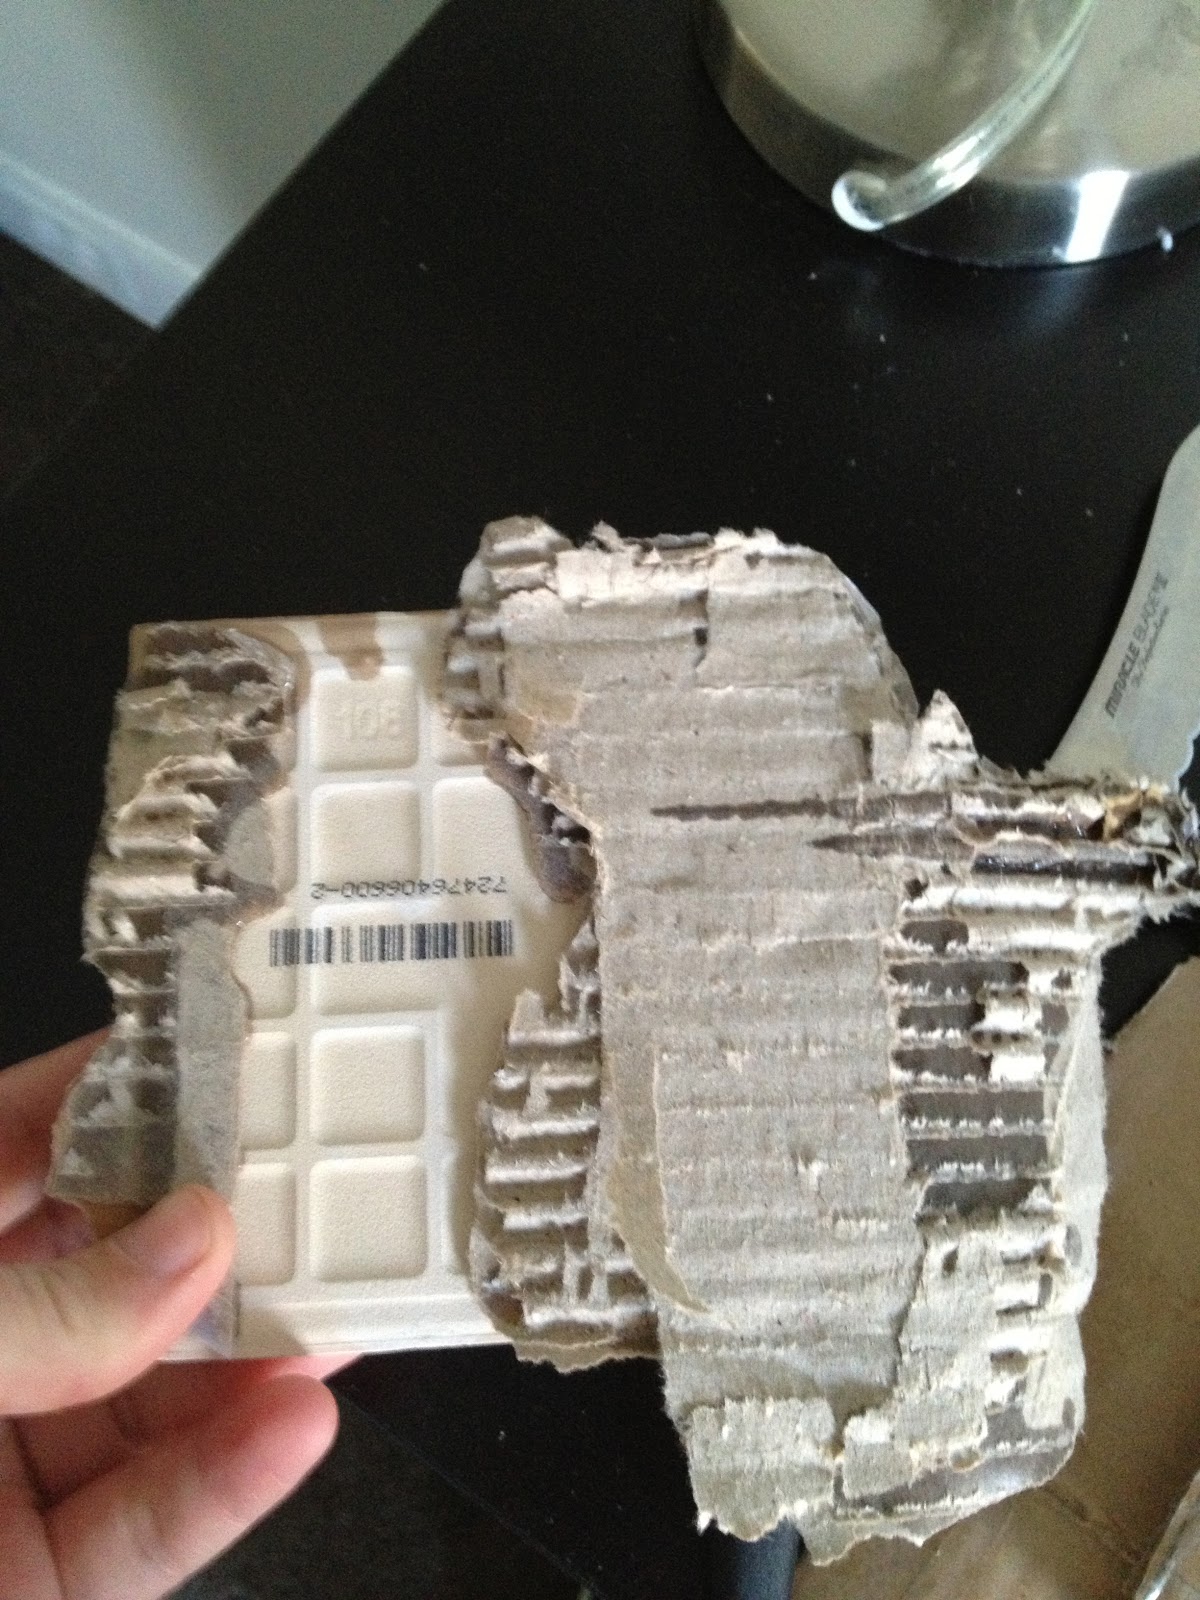
Make sure to move from the wet box below first. 
Or else, they'll literally stick to the box, like below. (Personal experience...)


Finally, place a little felt sticker on the bottom in all corners, and done.
As soon as I find a way to peel the cardboard off the back, I"ll post a picture of the completed coasters.

Fun with CORKS.

I like wine, but not enough to have a collection of corks.

If I did, I'd craft with them.

Cast of Characters:


  • Twine
  • Cutting board
  • Knife
  • Scissors
  • Ribbon
  • Corks
Like I said, I don't have a lot of corks laying around. You can buy them as a vase filler, I got these at Target in the vase isle.


First cork ornament, or corkament (as I'd like to call them) is a reindeer!


Cut two corks in half horizontally (the hamburger way, not the hotdog way)
Lay them in a group of four (like a square) and glue them together, these will be the legs.


Glue two corks to the top of the cork square for the body.


Glue another cork in the middle of the two to make a head like below.
Then accessorize it, give him a nose, some eye, some antlers.

And complete!

Next corkament: a tree!


Cut 3 more corks the hamburger way. 
This picture looks upside down.. hm.


Arrange them like this and hot glue together.


Hot glue some twine all around, and tie at the top.


And complete.


Enjoy your corkaments!

Friday, November 16, 2012

Rope Containers

Ever need an extra container for the bathroom to hold junk like tweezers?


Perfect, easy to do, and inexpensive solution.

Here's how.

Cast of Characters:


  • Scissors
  • Glue gun & glue
  • Rope (pictured better below)

Got this bad boy at Home Depot. 


To begin, hot glue the end.


Fold it onto its self.


Glue a part of the rope away from the folded piece and begin roll it to create a flat spiral.


Keep going until you have the size base that you want for your container all while using your hot glue to keep it in place.


Begin to roll it up the side now. 


Continue to roll, this time on top of the rope piece below, remembering to glue every now and then so that the container actually stays together.


Keep going until you have it the height that you want.


Cut the rope, and glue it. Done.


And this is how they look in the bathroom setting.